How to Write A Book: Nonfiction Blueprint for Success

I am excited to present Training Authors’ new resource for how to write a book. This is a comprehensive beginners guide to writing a nonfiction book covering planning, writing and editing. You will also learn tips to help you actually finish writing your book quickly.
There is a statistic that 80% of people want to write a book. You are probably in this 80%. Writing a book can bring tremendous benefits, including:
Building authority and expertise. Entrepreneurs and professionals use books to establish credibility, attract clients, or position themselves as thought leaders in their industry.
Creative expression. Writing a book allows authors to explore ideas, tell stories, or bring their creative vision to life.
Telling your story. You may feel compelled to share your personal journey, whether it’s overcoming challenges, achieving success, or experiencing unique life events.
Generating income. While not the primary motivation for all authors, writing books can provide a source of income through sales, speaking engagements, or business opportunities.
Whatever reason you may have for wanting to write a book, this guide is for you. If you find it useful, please bookmark it and share it with your friends. And now, let’s help you get your book written.
Steps to Writing A Book: Nonfiction Planning, Writing and Editing
Part 1: How To Start Writing A Book
- Choose Your Book Topic
- Create an Outline: Your Template For Writing A Book
- Book Writing Software and Apps to Simplify Writing Your Book
Part 2: Write Your Book Draft
- Stay Motivated And Write Regularly
- Write Your Book Introduction and First Chapter
- 3 Ways to Write Your Book Quickly
Part 3: Getting Your Book Ready For Publishing
Choose Your Book Topic

Now, it’s time to get started! The first thing you need to do on day one is to choose your topic. When choosing your topic, use this formula:
Your Knowledge + Your Passion + Demand = A Best-Selling Book Idea
Your Knowledge
If possible, you want to be able to narrow down your topic to something you have knowledge about already. When you write about something you already have experience with, it will flow more easily than if you are writing on a topic you are researching for the first time.
This does not mean you can’t write on a topic that is brand new to you. Just know that you most likely will not write a book on a new topic as fast, because you are going to have to do more in-depth research first.
Your Passion
The second thing to consider when choosing your topic is your passion. Do you have a passion for the topic? Your best work will come from topics you are most passionate about.
I once wrote a series of Kindle books on vegetarian cooking, but because I wasn’t passionate about it, I eventually retired the series instead of updating it. Therefore, find a topic you enjoy and are passionate about, whenever possible.
Demand
Your topic should be something people are interested in and will buy. How do you know if there is a demand for your topic on Amazon? Honestly, there is never a 100% guarantee your book will sell any number of copies. However, there is some research you can do ahead of time to determine if there is an audience for your book. You do this by determining how well your topic is already selling on Amazon.
To check demand on Amazon:
- Search for your topic in the Kindle Store.
- Check the Amazon Bestsellers Rank under “Product Details” on book pages.
- If a book ranks between #1 – #25,000, it’s selling well.
- Look for 5-10 books in your topic ranking within this range.
Brainstorming Your Book Topic
Now it’s time to brainstorm your book topic ideas. This is a process I recommend that you take time to go through. It will help you narrow your focus to the topic you have the most knowledge and passion for, with the most demand.
- Write anything and everything down at this point, in a notebook or on a white board. You can also do this with a mind map, but for this step, it’s easier to write it out by hand.
- Next, write on the left side of each topic how much knowledge you have about it from 0-10 (0 being no knowledge and 10 being expert knowledge).
- Now, write on the right side of each topic how much passion you have for it from 0-10 (0 being no passion and 10 being the most passion).
- Now, put a star on the left next to each topic you found that already has an audience on Amazon and is selling well (has at least 5-10 books in this topic ranking from #1 – #25,000).
- For each topic, add up the numbers for the knowledge and the passion and put it to the right.
- Finally, it’s time to choose your book topic. It should become apparent once you finish this exercise. It will most likely be the topic with the highest score and most demand.
I chose to do each step with a different color marker, but you can use the process that works best for you.

The topic you choose may not always be the one with the highest points or the most demand. As long as you know you may not sell a ton of copies of that particular book, go ahead and write it.
However, books with demand provide more exposure, and ranking well on Amazon can improve your visibility on Google.
Choosing the right topic sets the foundation for a successful book.
At this point you may also want to decide on your book title. You can also wait until you’ve written the book to choose the title, so don’t let this step stop you if you don’t have the perfect title right away. Read more about choosing a title for your book.
Create an Outline: Your Template For How to Write A Book
Once you have a topic, the next step is to create an outline. I know some people resist outlines because they prefer to “fly by the seat of their pants.” In the writing world, this is called “being a pantster.”
I strongly recommend that you outline your book first. This will allow you to write your book in the quickest, most effective, and least frustrating way. Think of an outline as your book writing template. Believe me. It works!
The Brain Dump
Write down everything you can think of related to your topic and everything you might want to include in your book. This step can go more easily if you have already organized your writing notes or journals into a clear system.
Ask yourself, “What do my readers need to know on this topic?” Then you can organize your thoughts into a logical order. Here are some tools you may want to consider when creating the brain dump.
Mind Mapping Software
A mind map is a visual way to create an outline. There is one main node and then branches that come out from that center node. I love using a mind map, because you can move things around.
Tools like Xmind, Miro, MindMeister, and MindNode offer robust mind-mapping features with additional collaboration functions.

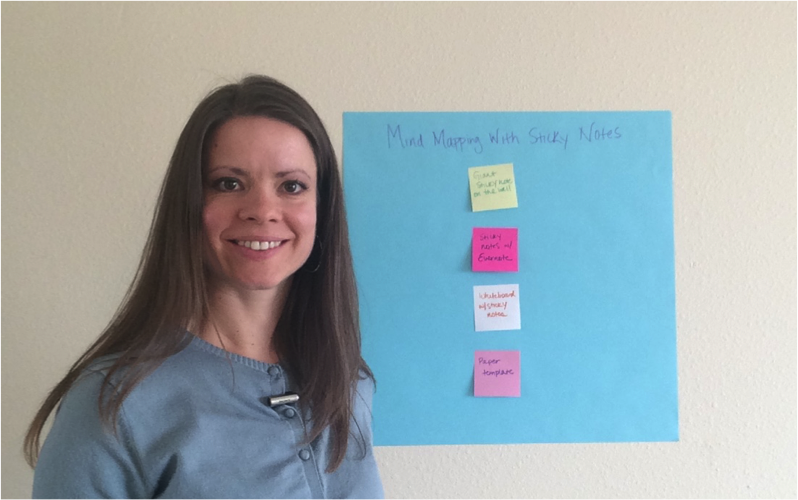
Sticky Note Method
You can also create a book outline with paper and pen – the old school way! I recommend outlining with sticky notes because you can move the sticky notes around. You can even purchase the giant sticky notes for your wall and then outline different sections of your book with smaller sticky notes.
White Board Method
I have also outlined projects on my white board. I recommend using your whiteboard as a place for capturing ideas in a brain dump. Personally, when I feel stuck, I get off of my computer, walk over to my white board, and start writing. It helps me get the flow of thoughts going again when I feel stuck.

No matter which of the above methods you use, it’s important just to get your outline done.
Book Outline Formula: Your Book Writing Template
Once you have finished a brain dump and have listed everything you want to include in your book, the next step is to start your official outline.
I recommend you start your outline with your chapter titles. For example:
- Introduction
- Chapter One: TITLE
- Chapter Two: TITLE
- …
- Conclusion
As you fill in the titles for each chapter, look at the flow and decide what makes the most sense. Is there something that needs to come before something else? For instance, when writing and publishing a book you need to outline it before you start to write it. Look at your chapter topics and make sure they follow a logical sequence in what you are teaching or sharing.
Once you have those chapters set up, you will put 3-5 main points under each chapter. Some chapters may have more, depending on how long they will be. For a book with around 10,000 words, 3-5 main points for each chapter should be enough.
Once you finish this process, you will have a great foundation to start writing your book. We’ll talk about some tips to write the chapters of your book in Part 2 later. Before you start writing though, let’s get your writing tools ready.
Book Writing Software and Apps to Help Write Your Book
Having the right tools can make the process of writing a book smoother. Book writing apps helps authors stay organized, format their work, and focus on writing without distractions. Unlike basic word processors, these specialized tools often include features like outlining, goal tracking, and distraction-free writing modes.
But be careful! It is much too easy to fall into the rabbit hole of exploring writing apps and lose track of what actually matters–writing. Here are a few tools for you to consider.
Atticus ($147)

Atticus is an excellent all-in-one writing and formatting tool, especially for writing nonfiction books. It offers a clean, distraction-free writing environment combined with powerful organization features. Atticus simplifies the entire book creation process—from drafting to professional formatting—without needing extra software. Its chapter-based structure, built-in goal tracking, and cloud accessibility make it easy to stay organized and work across devices. The real-time preview ensures your book looks great in print and eBook formats without needing additional formatting tools like Vellum.
Microsoft Word (from $0)
For the budget conscious, Microsoft Word is probably the best tool for writing a book. You probably already have it on your computer, or you can sign up for a free Microsoft 365 account to use Word for the web (sign up). Learn how to use the following features:
- Navigation Pane. Go to View > check “Navigation Pane”. Use Heading Styles (H1, H2, etc.) to organize chapters and jump between sections quickly.
- Styles Pane. Set up styles for Headings, Body text, Quotes, etc. Using Styles will ensure a consistent look throughout your book.
- Sections. Break your book into chapters using Section Breaks (Layout > Breaks > Next Page).
- Comments. Highlight text, right-click, and select “New Comment”. Use comments to remind yourself about writing decisions or to come back and review later.
Create A Writing Schedule to Stay Motivated and Write Regularly
Now, it’s time for the writing to begin! This is where the real action starts.
Writing a book is a big project and requires commitment and steady, consistent progress. In the previous sections, you split up this big writing project into smaller chunks with the outline. All you have to do now is write each part of your outline. A writing schedule will get you through the outline and help you stay motivated.
A Daily Writing Schedule
When Jerry Seinfeld was an up-and-coming comic, he developed a calendar system to help him become a better writer. He knew the way to become a better comic was to write more jokes and write more often.
His productivity secret?
He used a wall calendar. For each day he did his writing, he would put a big red X on the calendar. After doing it several days in a row, he started to form a habit.
Basically, don’t break the chain!

You can use this technique to write regularly too. Commit to writing for a minimum of 30 minutes each day. Put it on your calendar. If you don’t schedule it, it often doesn’t happen. During your writing time, focus on nothing but finishing that part of your book outline. This means you don’t answer the phone, you don’t get up for a drink, you don’t log onto Facebook. You remain focused on the task at hand!
If you have several hours to write, I recommend using the Pomodoro technique to help stay focused. This is a technique that breaks up your time into 25-minute chunks for writing. This is followed by a 5-minute break, where you can get up for a drink or bathroom break, or just to stretch your legs. This combined 30 minutes is a single Pomodoro session. Repeat for up to 4 sessions, at which time you will need a longer break or mental fatigue will start to set in.
Stay Motivated When Writing Your Book
Tracking your writing progress is a powerful tool to help you get more done in your writing time. It will give you clarity, because it will show you the time of day you write best, whether you get more done when you dictate or type. And it will give you encouragement, because you will see the progress you have made.
Writing apps like Dabble, 4theWords, or even Google Docs with add-ons now track word counts and sessions automatically.
I also have an Excel spreadsheet that I use. You can get this spreadsheet inside my free 7-day writing challenge.
If you want to make your own spreadsheet, these are the columns I have in mine:
- The date
- What was written (i.e.blog post, a book, etc.)
- The time of day (morning, afternoon, evening)
- Word count for that session
- Total time
- Dictated or typed?
Celebrate the progress that you made, whether it was 2 paragraphs or 2,000 words, celebrate. The more you get in the habit of writing, and the more that it feels like a reward, and you’re getting positive feelings from your writing time, the more you’re going to want to do it.
Write Your Book Introduction and First Chapter
You now have an outline, writing tools and a writing schedule. I’m going to give you a big boost by helping you write the beginning of your book.
The Important Introduction
I usually start with an introduction, which can include the benefits (what your reader will learn from your book). The benefits of your book are different from the features.
For example, my book Self-Publishing Books 101 is all about how to publish your book in multiple formats. But what are the benefits? Here is what I listed in the introduction of that book:
- You don’t have to share royalties with a publisher
- You keep 100% of the creative control of your book
- You can participate in marketing campaigns and promotions that aren’t available to traditionally published authors
- You can write, publish and promote your self-published books faster
So, think about the benefits your reader will get from your book and include them in your introduction.
The introduction is also an important part of your Kindle eBook, because it will most likely be available through Amazon’s “Read Sample” feature. Therefore, you want to make it as compelling as possible to draw your potential reader into your book, then buy it, and continue reading.
Chapter One: Your Story
Either in your introduction or in chapter one, include your own story. For instance, my first book took me one year to write and publish, whereas my last book took me one week. The turning point for me was when I learned a repeatable system.
In your story, you can include:
- What your situation was like before
- The turning point
- And what the results were after your turning point
Pretty simple, right?
But why should you include your own story? Your story helps establish a strong connection with readers. A storytelling approach like this is important because it helps build your credibility as an expert. It also creates an emotional connection, engages the reader and sets the stage for the later chapters.
3 Ways to Write Your Book Quickly
With the Introduction and Chapter One out of the way, you’re left with the “meat” of your book and the conclusion. The outline you created earlier will guide you, and your writing schedule will keep you on track. Now I want to share 3 ways that you can write your book quickly.
Option 1: Speaking Your Book
Did you know you could write a book by simply recording yourself talking? It really can be that simple.
I suggest you use this method if you prefer speaking to writing. To be honest, this is my preferred method, as I can speak my thoughts much faster than I can write them. Tools like Microsoft Word and Google Docs now have built-in dictation. Descript and Otter.ai also offer affordable transcription and editing in one platform.
Typically, you can speak faster than you can type. Research has shown that the average human being types at 31 wpm (words per minute) from memorized text, and 22 wpm while copying. If you are writing from scratch, it may be even slower than that, but let’s just say the average person can type at a speed of 22-31 wpm.
When someone is recording an audio book, it is normally read at 150-160 wpm. Slide presentations tend to be closer to 100-125 wpm for a comfortable pace.
So, let’s say you can speak your book at 100 wpm, and let’s say that you can write it at 25 wpm. Therefore you can speak your book four times faster than you can write it. If you are using my Excel spreadsheet, you will notice any trends and what works best for you.
Typically, you are not able to type as fast as you speak. So, definitely consider this option when determining which method you want to use to write your book. As mentioned earlier, Google Docs and Microsoft Word have built-in dictation. Simply start the dictation, and speak your book aloud. If you are going to record on your computer, you will need a microphone. I personally use a Blue Yeti microphone to record high-quality audio. Whatever microphone you invest in, choose one that can connect to your computer directly via USB.

Option 2: Write Your Book in Blocks of Time
The second option is to write your book in blocks of time. I recommend using this method if you have more time than money and if you prefer writing to speaking. This is also a great option to use when you have the ability to set aside blocks of time in your schedule to write.
I recommend that you go on a writing date. When you go on a writing date, you set aside a specific chunk of time and go somewhere specifically to write. You might schedule your writing date for three to four hours, it could be an entire day, or it might even be an entire weekend.
I have an author friend who is very busy. She has several kids, she is a pastor’s wife, she works outside the home, she writes books, she does the marketing for her books, she volunteers in her community, etc. You get the idea. Therefore, when she wants to finish a book, she will actually go on a writing retreat. She will set aside an entire weekend and will go to a place outside her home to focus on writing.
I have done books both ways, very successfully. Sometimes I will spend several hours in our local coffee shop. For one of my books, my husband and I went away to a retreat for the weekend, and I was able to finish a majority of the book then.
It’s amazing how productive you can be when you set aside intentional time to write.
Option 3: Hire a Ghostwriter
The third option is to hire a ghostwriter. Did you realize you don’t have to actually write the book yourself to publish a book? Many popular authors have used ghostwriters to write their books. You have that option as well. Use this method if you want a professional product, with as little time invested into the process as possible.
I don’t think many will choose this option, but I wanted to mention it. This option will definitely take longer, as you will be at the mercy of your ghostwriter. They usually require a certain amount of time to finish your project, whereas when you write the book yourself, you can get it done fast. A ghostwriter will also require a bigger investment up front.
Where do you find a ghostwriter? It’s best to stick to professional marketplaces with verified contractors when hiring ghostwriters. You can do a smaller project with someone to get a taste for their writing style, then go from there. Some places where you can find and hire a ghostwriter are:
Reedsy: This platform features a marketplace of ghostwriters, allowing you to browse profiles, request quotes, and chat with potential hires.
Fiverr: You can find ghostwriting services on Fiverr, filtering by genre, service options, and other criteria.
Upwork: Upwork is a platform where you can find freelance ghostwriters for various projects, including books, articles, and more.
Revise and Edit
Many authors struggle with trying to write their first draft as if it’s their final draft. The first draft should be all about getting words out of our heads and onto paper. It’s good to repeat to ourselves, “My first draft is not my final draft.”
Once we’ve completed our first draft, it’s now time to revise and edit. You may pass through your first draft four times doing different forms of self-editing.

We recommend stepping away from your first draft for at least one week so you have fresh eyes as you begin the self-editing process.
As you begin to self-edit, you want to look for basic spelling and grammar issues as well as flow and readability. Here are six ways to do it:
1) Spell Check
First of all, you should use the spell check feature included in your word processing software.
Also, make sure that you only have one space after each sentence and not two. Most modern word processors now auto-detect and correct double spacing and can flag passive voice and readability issues too.
2) Remove or Replace Your Crutch Words
Take time to find out if you use the same words over and over in your book. If so, these are your crutch words.
To discover your crutch words, you can use a free online tool like TextFixer’s online word counter.
AI-powered tools like Grammarly and ProWritingAid now automatically identify repetitive word use more effectively than Scrivener’s manual stats.
3) Read Your Manuscript Out Loud
This is a great way to catch mistakes. We often do this, even with blog posts or other short writing tasks. When you read your manuscript out loud, you can catch many errors and sentences that sound awkward.
4) Have Your Computer Read it to You
Most devices now include built-in text-to-speech (e.g., Apple’s VoiceOver, Windows Narrator). Your native operating system (OS) will also have built-in options for text-to-speech.
5) Print it Out
Another option for self-editing is to read a printed copy. Many times you will see errors on paper that you won’t catch on a screen.
Pro Tip: Once you print out your book, read it backwards sentence by sentence. You are reading each sentence as you normally would, one sentence at a time, but you start from the back of your manuscript. This will help you catch grammar and punctuation issues you may have missed earlier when reading each sentence in context.
6) Consider Using Editing Software
You may also want to consider editing software. Here are some options:
Grammarly – They claim to be the world’s most accurate grammar checker. They have a free version or you can upgrade to premium. We use the free version of Grammarly by using their Chrome extension; it helps us correct mistakes in emails, social media posts, etc.
ProWritingAid – Improve readability and avoid embarrassing errors with their tool. They have a free version for up to 500 words at a time and premium edition.
Hemingway Editor – There is a free online version and an app you can download. They do ask for a small fee if you want the desktop version, but you can use the basic software for free. This software will point out awkward sentences, hard-to-read sentences, how many adverbs you have, etc. It will even tell you the grade level you are writing for, and can be a helpful tool.
Autocrit -This is a paid tool used more often by fiction authors, but might be an option you want to consider.
Scribens – This is a free tool recommended by one of our mentors, Heather Hart. She says, “Scribens is my favorite self-editing tool. It catches my run-on sentences, overused commas, and so much more.”
Readable – This is another tool you can use that will quickly test the readability, spelling and grammar of your text and show you where to make improvements.
7) Add Emotion to Your Stories
Even if you are writing a nonfiction book, adding stories with emotion can be very powerful.
Save Different Versions
As you go through the self-editing of the final draft stage, we recommend saving your manuscript as different versions in case you ever need to go back to a previous version for any reason.
Some computers also save your versions in the cloud but we like to have multiple backups.
In Word, you can save the file as Book Title v. 2. This will save a new document.
In Google docs, click “File / Make a Copy” and rename it as Book Title v. 2.
We then recommend creating a folder called “OLD” and moving the previous version to the OLD folder so you don’t get mixed up on which one you are editing.
It’s also helpful to know there is real-time version history in tools like Google Docs and OneDrive or tools like Dropbox that manage versioning automatically.
Decide on Self-Publishing vs Traditional Publishing
When publishing your book, there are various options available to you.

Years ago, you had to go into a brick and mortar bookstore to buy the books you wanted. Now, you can buy books online from Amazon and other retailers.
As the way we buy and read books changes, so does publishing.
- No longer is it necessary to submit your book to a long list of publishers and endure rejection after rejection.
- No longer is it necessary to invest thousands of dollars in self-published books that will sit in boxes in your garage for years.
- No longer is it necessary to pay a publisher thousands of dollars to self-publish your book (this is commonly known as “vanity publishing”).
Print on demand (POD) technology has changed the game with companies printing copies of your book one at a time as your book is ordered.
It’s important to know the differences between traditional publishing, vanity publishing, and independent publishing (self-publishing).
- Traditional publishing is when you are published with a commercial publisher who takes care of the process from start to finish. You may get an advance, but your book royalties are much lower and it takes much longer to see your book in print.
- Vanity publishing is when a small publisher publishes your book at your cost. They typically charge thousands of dollars to publish your book. Plus, in order for you AND your publisher to make money, you have to price your book so high that it’s difficult to sell. It often gets priced right out of the market.
You also have to be very careful and read the fine print of your contract with a vanity publisher to make sure you aren’t giving away the rights to your book. For example, one author who is also an artist shared that she didn’t realize she was giving away the copyright to her artwork for the book cover when she signed the contract. Even though it was her artwork, she could not use that artwork anywhere else. Later, when she wanted to independently publish, she had to get a new cover for her book. - Independent publishing (self-publishing) is when you manage every stage of the process and publish your book under your own imprint. It’s much easier than you think!
Inside Christian Book Academy, we teach you how to independently publish your book or what you may know as self-publishing.
We also teach you how to hire the right people for your book project within your budget for the editing, book cover design, and formatting. This allows you to focus on what you do best – writing your book!
The benefits of independent publishing (self-publishing):
- Royalties: You don’t have to share your royalties with a publisher. Plus, you typically only get paid a couple of times a year with a traditional publisher vs. monthly as an independently published author. Typically, you can make more money selling 100 books as an indie author than traditionally published authors can make selling 1,000 books.
- Control: When you independently publish, you keep 100% of the creative control of your book. This means you don’t have to make changes that would go against your beliefs and/or interests.
- Time: On average with traditional publishing it takes 24 months to go from an edited manuscript to a book being published and arriving in bookstores. In the same two-year period, an independent author can potentially write, publish, and promote three titles.
Many writers choose a hybrid approach where some of their books are traditionally published and some are independently published.
You don’t have to choose between one or the other.
Some of our members have books that have been traditionally published and other books they independently published.

Conclusion: Now You Know How to Write A Book from Start to Finish
In this detailed post, we have sought to equip you with the necessary tools for how to write a book from start to finish. We live in a world where it’s literally possible for anyone to write and independently publish their book.
In summary, we looked at:
- Choosing Your Book Topic
- Creating an Outline: Your Template For Writing A Book
- Book Writing Software and Apps to Simplify Writing Your Book
- Staying Motivated And Writing Regularly
- Writing Your Book Introduction and First Chapter
- 3 Ways to Write Your Book Quickly
- Revising and Editing
- Deciding on Self-Publishing vs Traditional Publishing
With God’s Help, You Can Do This!
Maybe you’ve felt that tug on your heart to begin writing a book but have said to yourself, “I’m just not qualified” or “Who am I to write and publish a book?”
If you can relate to this mindset, you are in good company. Moses also found himself saying very similar things,
But Moses pleaded with the Lord, “O Lord, I’m not very good with words. I never have been, and I’m not now, even though you have spoken to me. I get tongue-tied, and my words get tangled.” Then the Lord asked Moses, “Who makes a person’s mouth? Who decides whether people speak or do not speak, hear or do not hear, see or do not see? Is it not I, the Lord? Now go! I will be with you as you speak, and I will instruct you in what to say.”
Exodus 4:10-12 NLT
God doesn’t call the qualified–He qualifies the called! If He is calling you to write a book for His glory, He will equip you with whatever you need to finish your book. After all of the excuses we present to God, He may be saying, “Now go! I will be with you as you write, and I will instruct you in what to write.”
Join Our Community!
Writing a book can sound like a daunting task on our own. Our Christian Book Academy is a community of like-minded authors who decided to move forward in their call to become a Christian writer. In fact, we have helped over 1,000 Kingdom writers like you take a step of faith and finish their books of all kinds, from writing devotionals, prayers, and more.
We would like to invite you into our community so you can receive the support, knowledge, wisdom, and accountability that can help make your book a reality and find its way into the hands who need it most.
Take a Step of Faith and Finally Finish Your Book
Most writers stay stuck and never finish their first draft. Inside Christian Book Academy, we help you partner with God to write your book so you can become a published author. Finally ditch your self-doubt and take a step of faith so you can finish your book.
Not ready to join our community? We still have resources to support you! Check out our free training for Christian writers and the 50+ must-have resources for Christian writers.
Last Updated: August 31, 2025