As authors, social media can take up quite a bit of our time that might be better spent doing other marketing or writing activities. One way I have found to combat the time I spend on social media is by taking one day a week to pre-schedule some of my facebook posts. In this tutorial, I’ll share some benefits of bulk scheduling as well as how to schedule your posts, and how to choose the best time to schedule your posts for maximum exposure.
Are you ready?
Why Pre-Schedule Facebook Posts?
Obviously, I already mentioned that it can save you a ton of time. I have found that by setting aside a 30-45 minutes once a week, I can save myself hours of wasted time later on. What I do is schedule 1-2 posts a day, then I only have to check in to see if I have any comments, or post new things that come up. It keeps me present without sucking all of my time. It also allows me to do all of my brainstorming at once. This way, I’m not trying to think of something to say or share each day.
Scheduling posts allows you to maintain an online presence, even if you take a day off. You can pre-schedule posts and take off, knowing that you’re not neglecting your marketing efforts. While I don’t advocate automating all of your Facebook interaction, scheduling posts does offer more of a lifestyle freedom. I generally try to check into my Facebook page at least once a day (usually more), but I know if I take a day off to go on a field trip with my 1st graders, I’m still covered online.
And finally, when you pre-schedule your Facebook posts, you can schedule them to go live at the perfect time…
When to Schedule Your Facebook Posts
Facebook offers insights for pages. One of the insights it offers is to tell you when your fans are online. By monitoring this, you can choose the best time to schedule your Facebook posts.
Here’s how:
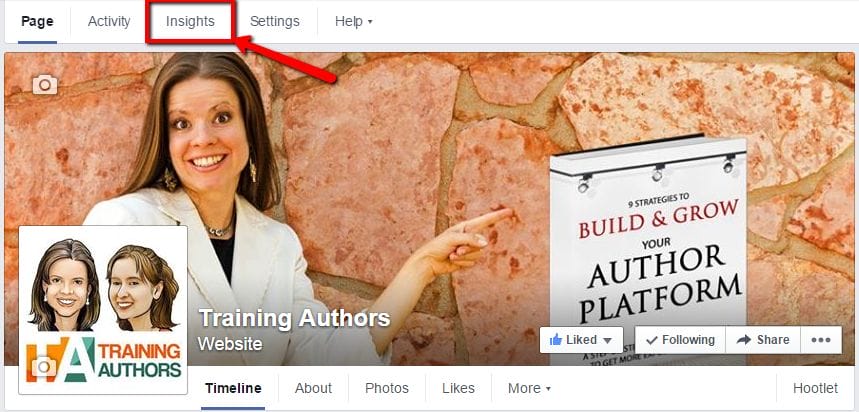
Step #1: Click the “Insights” Tab
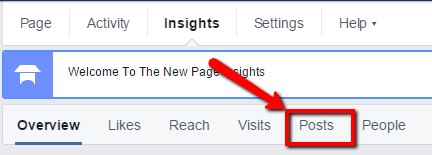
Step #2: Click the “Posts” Option
Step #3: Check The Time Graph
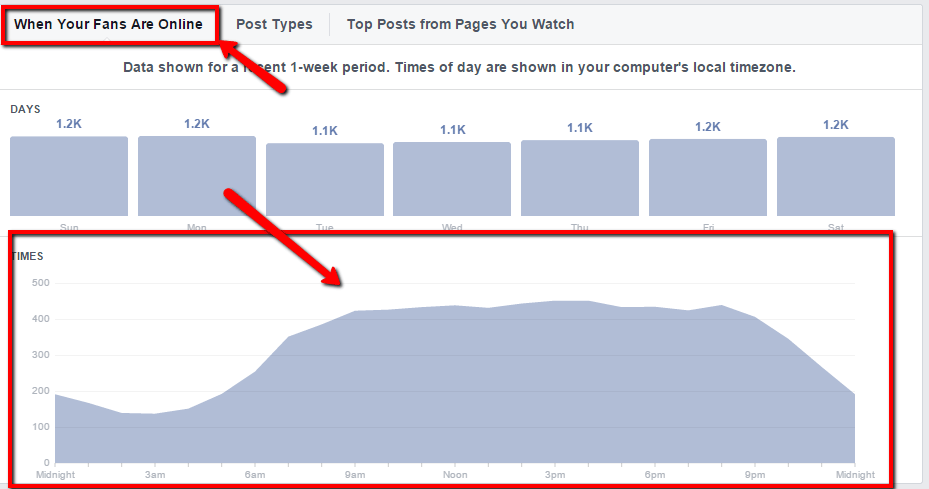
Facebook outlines when your fans are online in a graph to give you a visual aid. This does change as your fan base changes, so make sure to check it at least once a month. Up until last month, our graph had two peaks instead of one. We had the highest fan base between 11 and noon, and then again from 2 to 4pm. After our recent video launch, we gained a lot of new fans and our demographics changed quite a bit. Now our peak is from 9 am through 8 pm. So we have a wider window of when we can schedule posts for the maximum exposure.
Which brings us to the next part…
How to Schedule Your Facebook Posts
Step #1: Go Back to the Main “Page” Tab at the Top of Your Screen
Step #2: Enter Your Post as Normal (Don’t click post)

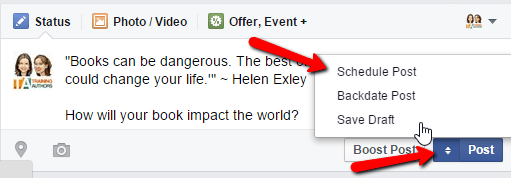
Step #3: Open the Drop Down Post Menu and Click “Schedule Post”
To schedule your post, you’ll need to click the arrow option to the left of the “Post” button to open up the drop down menu. It actually looks like it’s attached, but it’s a separate option. That will bring up a menu where you can schedule your post, back date it, or save it as a draft (also a helpful feature).
Step #4: Schedule Your Post
In the pop up box, set the date and time you want your post to go live. Then click “Schedule”
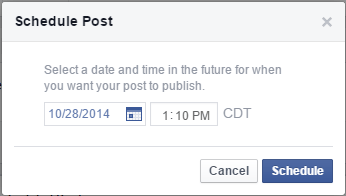
That’s all there is to it. Your post will be scheduled to go live at the time and day you set. You can check to verify your post was scheduled correctly and edit/delete it if necessary by clicking either the “Activities” tab at the top and then “Scheduled Posts” on the left hand side of the screen, or by clicking the “See Posts” option in the box that tells you how many posts you have scheduled and when the next one will go live.

Watch me go through the process below:
I hope you found this post helpful in your Facebook marketing. We’ll be sharing other helpful tips in our upcoming “Sell More Books 30-Day Challenge.” Find out more and join us at: www.trainingauthors.com/challenge
Like this tutorial?
Check out: How to Schedule Videos on YouTube
Great info… Thanks!!!